

This isn't actually the post I wanted for this week, but I haven't made a post in so long (sorry!) so I thought I had might as well post this one now.
I actually made this delicious brownie graveyard before Halloween, but let's be real, I'd do this all the time if I could. Although this batch ended up pretty messy, I was actually really happy with it!
There's a lot of steps to this lovely cake, so let's get started.
FIRST, THE BROWNIE...
I made a small brownie, but if you want to double or even triple the size, just double/triple the ingredients! You will need:
- 50g Butter
- 125g Sugar
- 70g Milk Chocolate
- 1/2 tbsp Golden Syrup
- 1 Egg
- 1/2 tsp Vanilla Extract
- 50g Plain Flour
- A pinch of Baking Powder
- 2tbsp Chocolate Milkshake Powder (or 1tbsp Cocoa Powder)
Pre-heat your oven to 180 degrees. Grab yourself a pan, and put the butter, sugar, chocolate and golden syrup into it. Place this on a low heat and wait for it to melt, mixing until it is smooth. Then, remove the pan from the heat.
Mix the egg in a cup until it is light and fluffy. Add this to the pan, along with the vanilla, flour, baking powder and chocolate milkshake powder. Mix this all together until it is gooey and smooth.
Pour this into a cake tin and bake it for 15-20 minutes. The house will smell delicious! Once cooked, remove it from the oven and allow to cool.

Okay, so that's the brownie out the way. Now we need to make the graves and bones!
TO MAKE THE GRAVES AND BONES...
You will need:
- Lots of chocolate of your choice!
- Matchmakers/sticks of chocolate
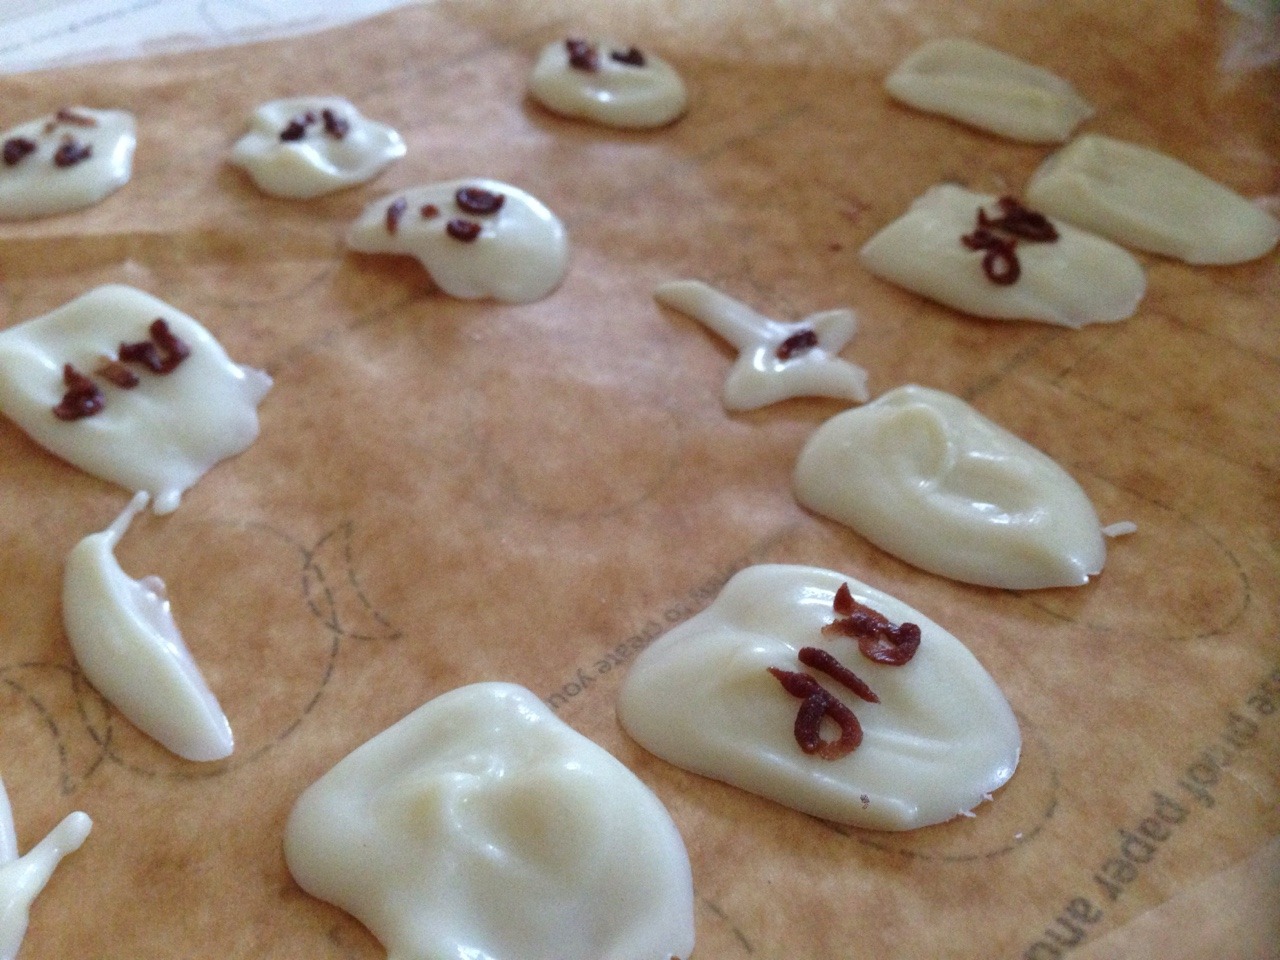
Grab some chocolate, I chose white chocolate buttons for this, Melt this either in the microwave or over a bain-marie (a heatproof pot on top of a pan of boiling water)
While this is melting, grab yourself an A4 sheet of paper and some greaseproof paper. On the A4 sheet, draw or print out small basic graves and bone shapes, and also some skulls. They don't need to be intricate! Place the greaseproof paper over the designs.
Grab the melted chocolate and put it in a piping bag (if you have one). If, like me, you're unorganised and do not own a piping bag or ziplock bag, you can delicately use a teaspoon or kebab stick to fill in your designs. It doesn't matter if it gets messy, it could be an abandoned graveyard!
Grab yourself some chocolate sticks (for example MatchMakers in the UK). Break one in half, then in half again. Grab yourself a whole stick, and then place 1 of the quarter sticks to each side near the top. This will form a cross. Use the leftover melted chocolate buttons as glue.
You can go in with a chocolate writing pen to draw eyes and mouths and RIP's to the decorations once they are dry!
TO MAKE THE BUTTER ICING
I made the nicest butter icing in the world! Like mentioned before, I didn't have any cocoa powder, and could only find chocolate milkshake powder. However, that made this icing absolutely delicious. You will need:
- 140g Butter Icing
- 280g Icing Sugar
- 1-2tsp Milk
- Lots of chocolate milkshake powder (do it to your taste!)
Cream together the icing sugar and butter. You might notice it's too thick, in which case add the milk until you are happy with the consistency (you might not even need the milk!) Then, pour in as much chocolate milkshake powder as you desire. I used loads since I wanted it dark and chocolatey and it was literally THEE best thing.

FINISHING TOUCHES...
Coat the entire brownie in lashings of the butter icing. Crumble up some oreo (if you have any, or any chocolate biscuit) and sprinkle it on as dry mud. Grab some matchsticks/chocolate sticks and surround the brownie, as though an old wooden fence. Finally, position your skulls and graves on top.
And there you have it, a beautiful, delicious, gooey chocolate graveyard!
