Thursday 23 March 2017

PIERCING: MEDUSA/PHILTRUM PAIN AND ISSUES


Hello strangers!

Well, it looks like my one week break ended up being a little more than a week, didn't it?! But I am determined to get back into my weekly/fortnightly blogging, so expect to see a lot more from me!

I only went and got another needle shoved into my body like the idiot I am, so I'm now up to 15 piercings again (yay!). For months, I was deciding whether I wanted a medusa piercing or a vertical labret piercing. Vertical labret had been my personal preference for a long time, though I was really scared it would completely mess up my lips. After turning to the lovely people of Twitter, a vote stated that 80% of my followers thought a medusa piercing would suit me more. And that was my decision made for me.

THE PIERCING PROCESS


As someone who has had many the piercing in many the sensitive place, you'd think I would be completely calm about getting a needle shoved into my face. Well, my lovelies, you couldn't be more wrong. I was terrified. After weeks of googling how much it hurt, and stories from other people, I was petrified. But off to the piercing shop I went, with my friend who was getting her nose pierced.

Image may contain: one or more people and text

The lovely ladies at reception told us that we could go in together. I asked one of them, who had her medusa done, how much it hurt, and she told me more than my septum did... which my eyes streamed for. I'd done my makeup really nicely, and there was a very pretty boy working at the shop, so I really didn't want to leave as I did when I had my septum done- with black streaks down either cheek. My friend got her piercing first, and I thought I would see whether our piercer was an aggressive stabber or a calm and gentle piercer. Bare in mind, nose piercings are one of the least painful... the look on my friends face suggested this lady was an extremely stabby stabby person. I could feel my heart in my mouth.

I went and sat down on the chair and the lady marked out a little dot in the middle of my cupids bow. At first, it looked a little off centre, so she moved it slightly. Personally, I still thought it was slightly off, but both the piercer and my friend said it looked dead on and I went with their judgement. Out came the clamp, and my upper lip was lifted straight. I saw my friend looking down at her phone, I breathed in, and in went the needle. And then my friend looked up, and it was done. It didn't hurt at all. Not at all. I didn't flinch or cry. I was in shock!

Filled with adrenaline, we left the shop. It began to hurt slightly- it felt tight, like there was a leech sucking at my cupids bow that I just couldn't get rid of, but that was understandable.

Image may contain: one or more people and text


HEALING


So, when you get a medusa piercing, you need to wash both the inside and the outside with a salt water solution. The outside just needs a little cotton bud soaked in the solution, while the inside requires you to use the solution as a mouthwash for at least 30 seconds. You need to brush your teeth and SSS whenever you eat, but you shouldn't do it more than 4 times a day as it could dry it out and irritate it. It requires a lot of mothering.

Eating was fairly hard, because you need to learn to move your mouth slightly differently, and the bar gets in the way a little. Biting on that thing HURTS. I still do it sometimes by accident hahahah!

For those who are worried about swelling... mine swelled up, a LOT. I had work the next day and people honestly thought I had had lip fillers. They said it looked good, though. My swelling was there for about a week, though it stayed slighly swollen for a few weeks after that. I kind of miss the extremely swollen lip look.

Image may contain: 1 person, selfie and close-up


PIERCING ISSUES


Now, my piercing got a little irritated. This part is just to make you aware of what to do if you get into a similar situation. There was a strange lump on the inside, and it was like my gum was growing over the bar. This had been my biggest fear when getting this piercing. You couldn't feel it at all, but if I lifted my lip, it was just chillin' there. I contacted the piercers who were wonderful, and they said crush up an aspirin and make it into a paste with warm water and hold it on for a couple of minutes. The solution tasted vile, but sure enough, doing this 2-3 times a day made the lump go away!


Please enjoy this beautiul photo of my swollen lip lump (but you need to see in case yours ever does the same!)

I adore this piercing so much. It looks amazing both with and without a septum piercing (I am going to make a post about my septum jewellery in the near future). If you ever have any questions about this piercing, or any other piercings, feel free to contact me on my contact page or on my social media (Twitter/Instagram). If you want to see any more posts like this about my other piercings, let me know!


Thursday 8 December 2016

INTERESTING: LIVE DEATHS ON TV

Hello one and all!

It has been a long time since I have written a post (I'm sorry, there's been a lot of assignments due in!) I have attempted to film an updated makeup tutorial, but will probably re-film since I was not happy with the footage.

I thought this post might interest a few people, so it was worth sharing. We all know how in the Tudor period, public hangings were almost the entertainment of the time... just a day out for the family... watching someone die...

Watching people die is not something we do anymore - it's scary and morbid. But sometimes, things do go wrong. Recently, I have been looking up cases where people have died on TV, and here are some of the goriest examples.

WARNING: THIS IS NOT FOR THE FAINT HEARTED.

1) The LA Freeway Suicide
This footage was from 1998. The man in this video, Daniel V Jones, was a 40 year old maintenance worker dying from AIDs. He wanted to take a stand against medical mistreatment. The police chase was being aired live on TV, and families watched as Jones set fire to his truck, in turn setting fire to himself, before pulling out a gun and shooting himself in the head.


2) The Fox News Suicide
After the previous footage, news channels were supposed to have a gap between live footage and the footage broadcasted. This meant that if anything DID happen, they would be able to stop the footage so people at home would not see. However, in 2012, Fox News seemed to forget to add the delay, and to the horror of those watching, they saw 33 year old Jodon F Romero shoot himself on live TV. After an hour long car chase, Romero drove off road, and that is where the incident took place.


3) Robert Budd Dwyer
This is a very famous video which circulated Facebook numerous times. In 1987, Robert Budd Dwyer called a news conference. At the end of his speech, he pulled out a gun from an envelope, placed it into his mouth, and shot himself in the head. The reporters around him and those watching at home stared on in horror as blood poured out his nose like a waterfall. Of all the videos, this is the one that got to me the most.


4) Indian Politician
This one is another one that really got to me. It's fairly long, so skip to about 1 minute in. This Indian politician, Vijayan Mash was talking to a crowd of people at a press conference when he just died of natural causes (.. though many expect someone put something in his drink). He looked fine before, and then he was just gone. It's almost like you can see his soul leaving his body.


5) Tommy Cooper
This is yet another famous death. Tommy Cooper was a well loved comedian. In 1984, while performing in Her Majesty's Theatre, Cooper suffered from a heart attack. The most gripping part of this, was the audience believed it was part of the act. They looked on, laughing, not realising they were actually watching the beloved comedian die in front of their eyes.


I'd like to make a few more posts like this about different things, such as cults, mass suicides etc. This is what I enjoy learning about, something about these topics really do fascinate me, and I hope other people enjoy learning about it too!

I hope you all have a wonderful week. I'll get back into post writing soon, I promise!

Thursday 17 November 2016

BAKE: GOOEY CHOCOLATE BROWNIE GRAVEYARD


This isn't actually the post I wanted for this week, but I haven't made a post in so long (sorry!) so I thought I had might as well post this one now.

I actually made this delicious brownie graveyard before Halloween, but let's be real, I'd do this all the time if I could. Although this batch ended up pretty messy, I was actually really happy with it!

There's a lot of steps to this lovely cake, so let's get started.

FIRST, THE BROWNIE...
I made a small brownie, but if you want to double or even triple the size, just double/triple the ingredients! You will need:

  • 50g Butter
  • 125g Sugar
  • 70g Milk Chocolate
  • 1/2 tbsp Golden Syrup
  • 1 Egg
  • 1/2 tsp Vanilla Extract
  • 50g Plain Flour
  • A pinch of Baking Powder
  • 2tbsp Chocolate Milkshake Powder (or 1tbsp Cocoa Powder)


Pre-heat your oven to 180 degrees. Grab yourself a pan, and put the butter, sugar, chocolate and golden syrup into it. Place this on a low heat and wait for it to melt, mixing until it is smooth. Then, remove the pan from the heat.

Mix the egg in a cup until it is light and fluffy. Add this to the pan, along with the vanilla, flour, baking powder and chocolate milkshake powder. Mix this all together until it is gooey and smooth.

Pour this into a cake tin and bake it for 15-20 minutes. The house will smell delicious! Once cooked, remove it from the oven and allow to cool.


Okay, so that's the brownie out the way. Now we need to make the graves and bones!

TO MAKE THE GRAVES AND BONES...
You will need:
  • Lots of chocolate of your choice!
  • Matchmakers/sticks of chocolate

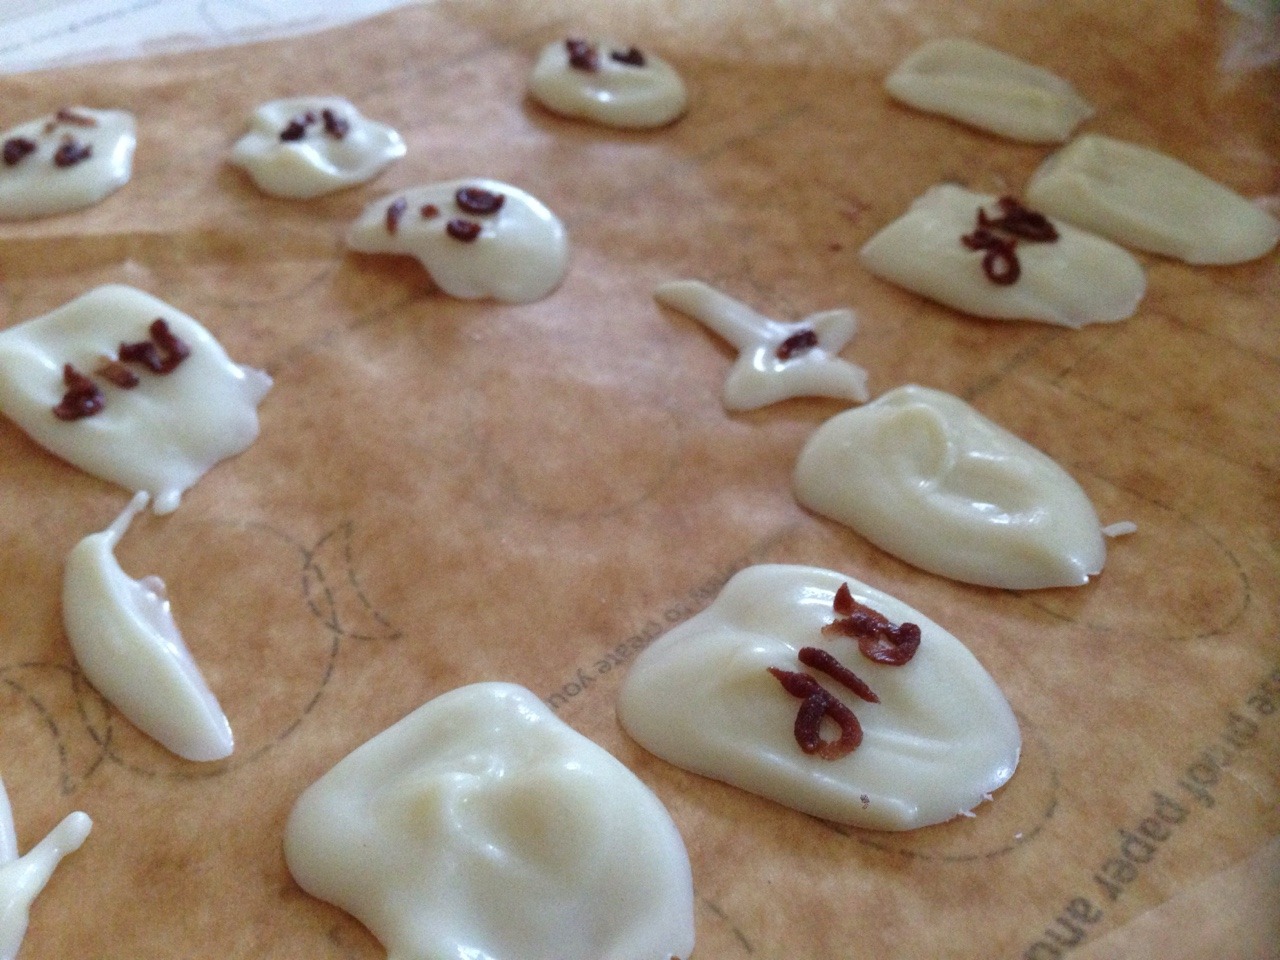
Grab some chocolate, I chose white chocolate buttons for this, Melt this either in the microwave or over a bain-marie (a heatproof pot on top of a pan of  boiling water)

While this is melting, grab yourself an A4 sheet of paper and some greaseproof paper. On the A4 sheet, draw or print out small basic graves and bone shapes, and also some skulls. They don't need to be intricate! Place the greaseproof paper over the designs.

Grab the melted chocolate and put it in a piping bag (if you have one). If, like me, you're unorganised and do not own a piping bag or ziplock bag, you can delicately use a teaspoon or kebab stick to fill in your designs. It doesn't matter if it gets messy, it could be an abandoned graveyard!

Grab yourself some chocolate sticks (for example MatchMakers in the UK). Break one in half, then in half again. Grab yourself a whole stick, and then place 1 of the quarter sticks to each side near the top. This will form a cross. Use the leftover melted chocolate buttons as glue.

You can go in with a chocolate writing pen to draw eyes and mouths and RIP's to the decorations once they are dry!


TO MAKE THE BUTTER ICING
I made the nicest butter icing in the world! Like mentioned before, I didn't have any cocoa powder, and could only find chocolate milkshake powder. However, that made this icing absolutely delicious. You will need:

  • 140g Butter Icing
  • 280g Icing Sugar
  • 1-2tsp Milk
  • Lots of chocolate milkshake powder (do it to your taste!)

Cream together the icing sugar and butter. You might notice it's too thick, in which case add the milk until you are happy with the consistency (you might not even need the milk!) Then, pour in as much chocolate milkshake powder as you desire. I used loads since I wanted it dark and chocolatey and it was literally THEE best thing.


FINISHING TOUCHES...
Coat the entire brownie in lashings of the butter icing. Crumble up some oreo (if you have any, or any chocolate biscuit) and sprinkle it on as dry mud. Grab some matchsticks/chocolate sticks and surround the brownie, as though an old wooden fence. Finally, position your skulls and graves on top.

And there you have it, a beautiful, delicious, gooey chocolate graveyard!


Thursday 27 October 2016

BAKE: SPICED PUMPKIN CAKE BITES


As you may have read in my previous post, that was the first time I had ever carved a pumpkin on my own. This year seems to be my first for anything Halloween related, so why not try pumpkin for the first time, too?! I came up with a really easy recipe you can use for any of the pumpkin flesh you scraped out, creating delicious cakes! This was originally supposed to be biscuits, but honestly, I can't make biscuits to save my life. I don't know whats wrong with me, I follow recipes exactly and still come out with flat cakes, so I'm just going to go with it for this one and call them cake bites!

So, what will you need for these little mouthfuls of pumpkin deliciousness?


- Plain flour (300g)
- White sugar (300g)
- Margarine (125g)
- Salt (1/2 tsp)
- Bicarbinate of soda (1 tsp)
- Baking soda (1 tsp)
- Egg (1)
- Vanilla extract (1tsp)
- Mixed spice (3tsp)

- Pumpkin pulp (250g)


(TOP TIP: If you find yourself having too little/too much pumpkin pulp, divide the number by 250g. For example, if you had 220g pumpkin, then do 220/250 which is 0.88. Times the measurements of the other ingredients by that number, so the sugar and flour are both 300/0.88, so that would be 264g of them both!)


First, you need to cream together your sugar and butter, until you get a pale, sugary paste. This step doesn't take long at all!

Grab the pumpkin pulp, and throw it in a food processor. I hadn't cooked my pumpkin (and I was not aware that was something you could do), though after a bit of Googling, I found raw pumpkin is completely fine to eat, so that makes this recipe a lot easier and quicker!!


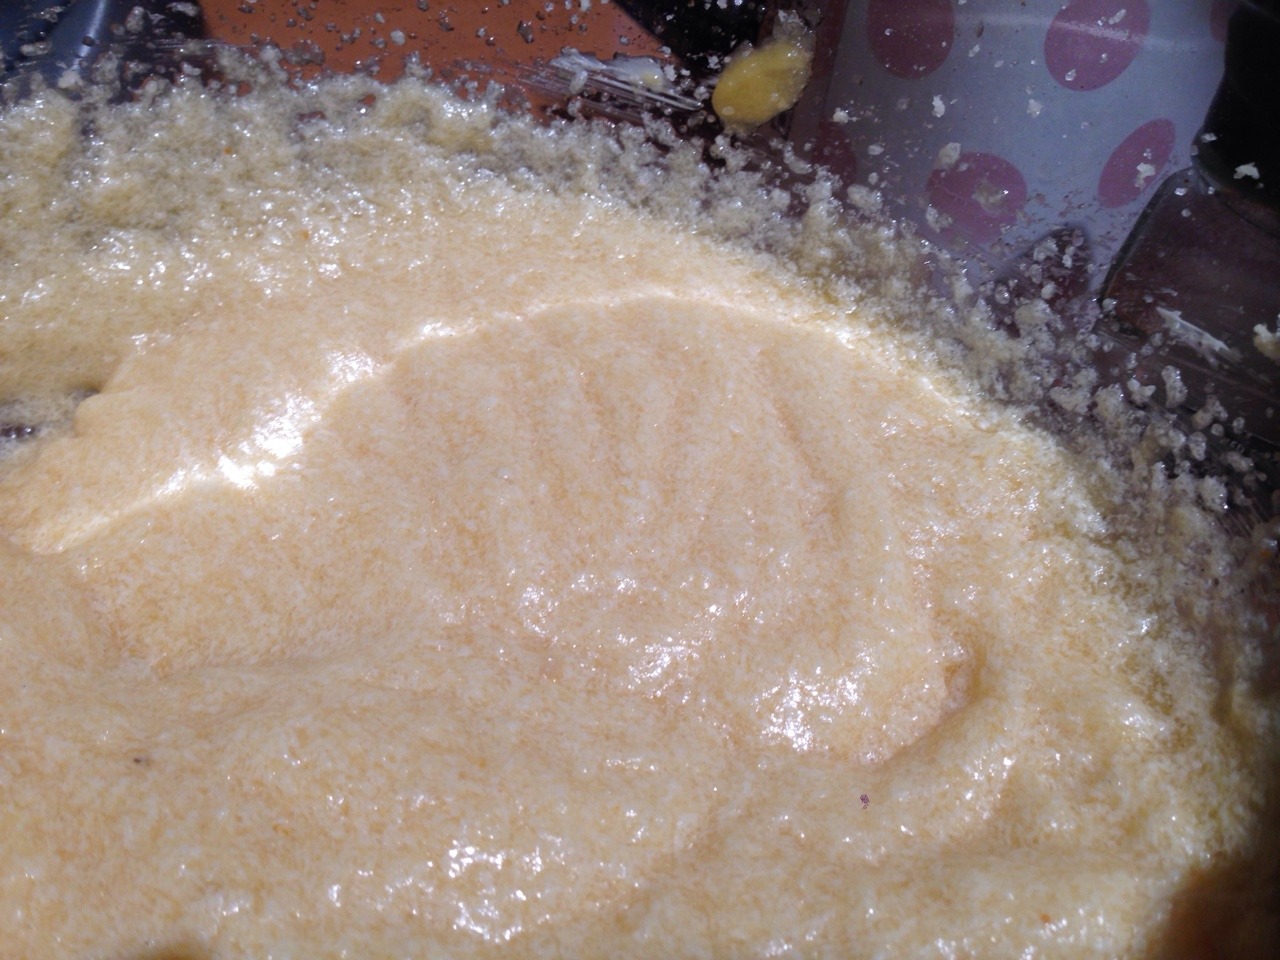
Now you need to add the wet ingredients. Crack in the egg, and add the pumpkin and vanilla extract. Whizz it all up and you're left with this strange looking wet mixture.


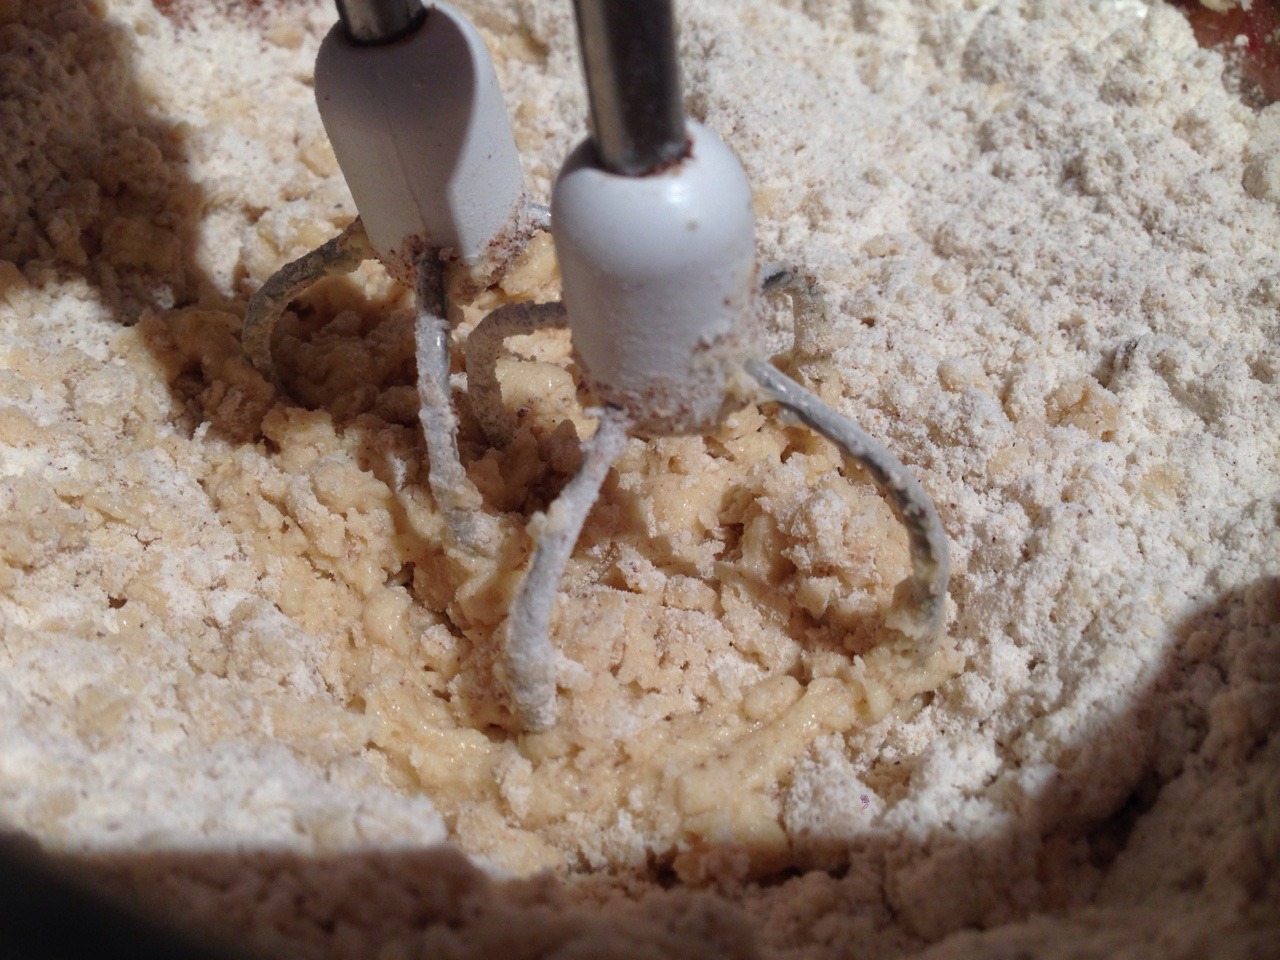
Now you add the dry ingredients! Throw in the bicarbonate of soda, baking powder, salt, plain flour, and mixed spice, and give it a good blend. And then that's it!


Scoop the mix into a baking tray, just putting 1-2 teaspoons on in a blob. You could try making these into cute cupcakes too, they'd just take a little longer to cook!


And here they are! I've sprinkled cinnamon sugar on top of mine, and I tried making a thin white icing to drizzle, on some of the others too!

Honestly, these are absolutely delicious and a great way to use up those icky pumpkin insides!

I hope you all have a wonderful Halloween, and enjoy this scrumptious recipe!

- Sian

Thursday 20 October 2016

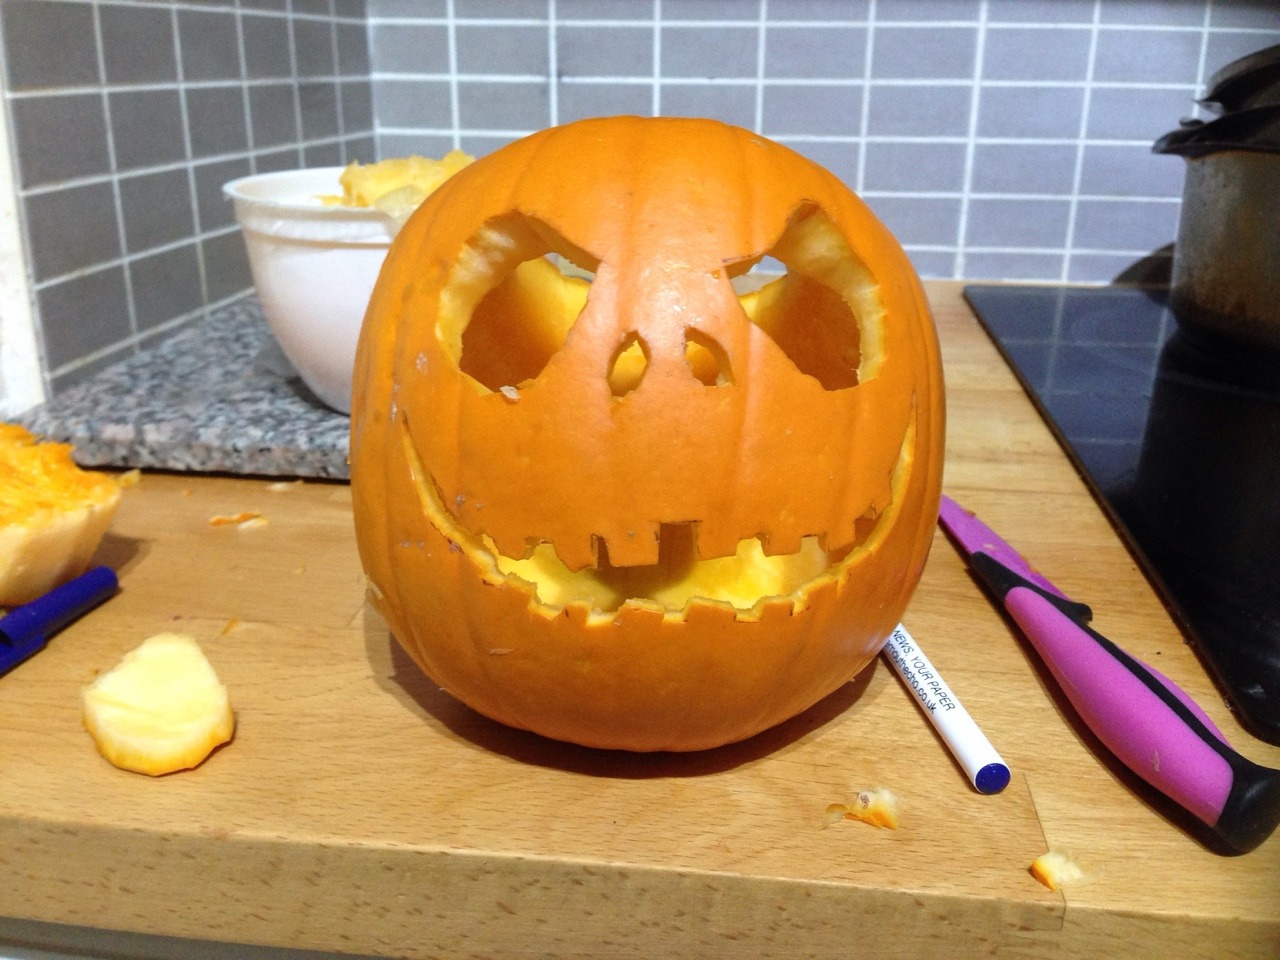
DIY: JACK SKELLINGTON PUMPKIN CARVING

I know what most of you are thinking, "Everyone knows how to carve a pumpkin, why is she writing this??" Well, this was the first time I ever carved a pumpkin on my own, and let me tell you, it was harder than I thought! I'll actually be following this blog post up with a delicious and easy recipe that you can use the pumpkin insides for, so keep a eye out for that next week!

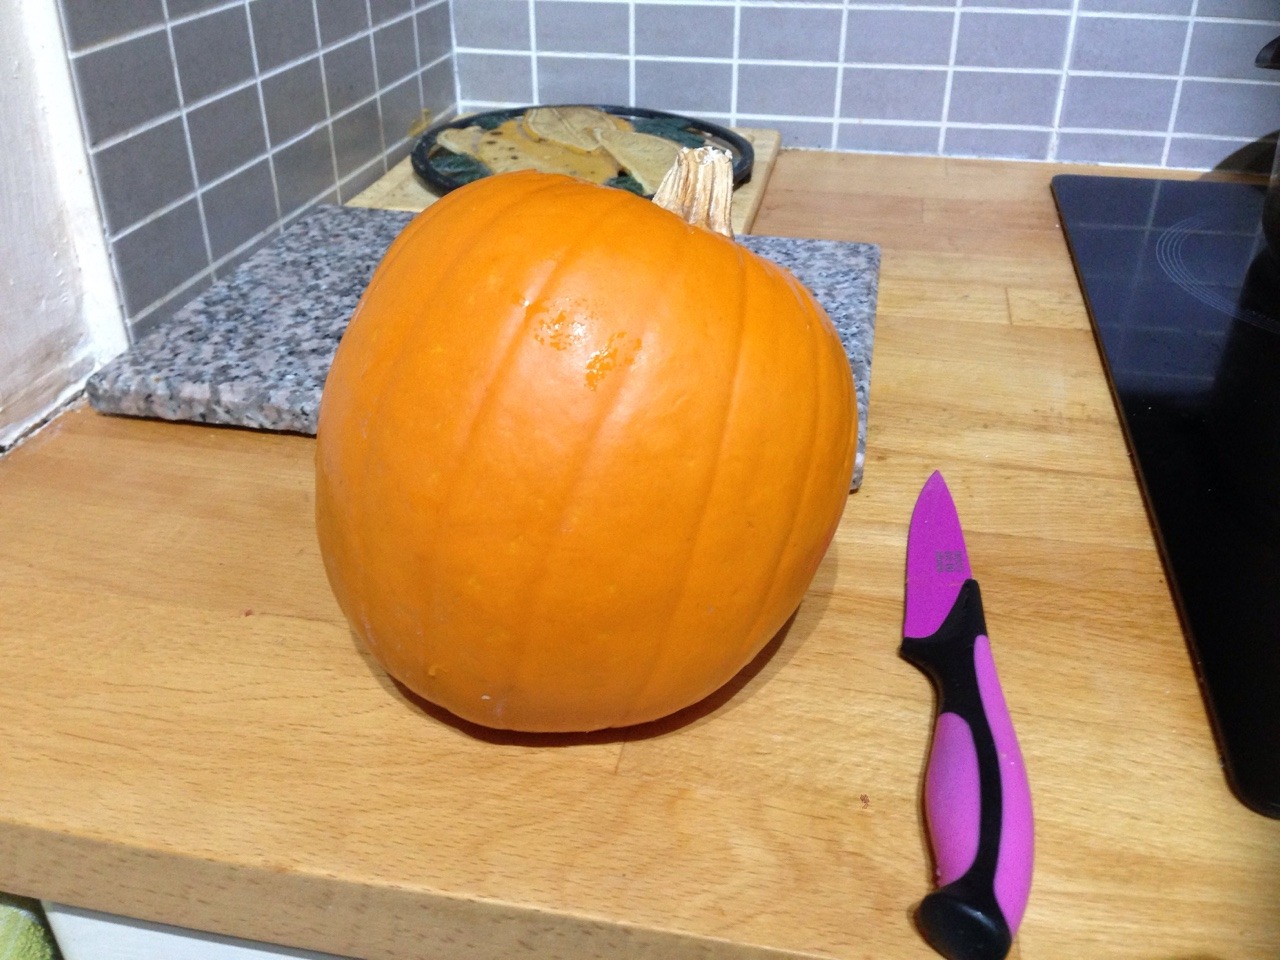
Let's just begin, shall we? Of course, you're going to need the obvious- a pumpkin, a spoon, and a knife... and maybe a pen if, like me, you enjoy planning beforehand. If you want to be all fancy and grab yourself a carving kit, go ahead!


The first step is co carefully cut the lid off (don't throw it away, you'll need it later!) and scrape out all those insides. You want to get as much of them out as you can- the less insides there are, the easier it is to cut, and also the more pumpkin you have for the recipe!


If, like me, you're a bit clumsy and enjoy planning beforehand, this is where your pen comes in. Start to draw an outline onto your pumpkin. I looked up images on Google and kind of chose a few that looked good, then drew it as best I could on the pumpkin


This is where the scary stuff happens. Grab the knife and CAREFULLY cut out where you've marked. As you can see with mine, I didn't do it very neatly, however that didn't actually ruin the end pumpkin, so don't worry if it's a bit messy! Just make sure you keep your hands out the way of the blade.


I found the mouth to be the hardest part, so I did it in smaller sections, taking breaks. Make sure you get all the teeth and the sharp points of the corners of the mouth!


Now all you need to do is light a little tealight, place it in the pumpkin, and replace the lid. And there you have it! A beautiful Jack Skellington halloween pumpkin!

(Can we just take a second to appreciate this being my first proper Halloween so I am VERY excited and proud of my beautiful creation)

HAPPY CARVING!

Thursday 29 September 2016

DIY: HARNESS BRA

Hello all! I have been a huge fan of harnesses for a very long time, and was lucky enough to win my first in a competition two years ago. Elastic harnesses are beautiful and all, but can be extremely fiddly to get off when you're wearing them on top of your favourite bra. I was happy to see a rise in the amount of harness bra's for sale- being a huge fan of Hopeless Lingerie, seeing that brands such as Missguided and Asos were selling dupes at affordable prices was a real shocker. However, something that I've noticed is it is pretty rare to come across a padded harness bra... and being someone who is lacking in that region, I knew I'd much prefer it if I could look bustier with the pretty harness design, so decided I'd have a go at making my own!

This bra that I am making is an extremely simple design just to show you how easy it is to make it yourself, but if you want to make a more ambitious design, you're more than welcome to! I know in the future I want to make a lot more. Anyway, let's begin!

You will only need a few bits and bobs for this DIY:

  • a bra (I chose this black plain satin-like one)
  • lots of ribbon (preferably the same colour as the bra)
  • a sewing kit (needles, and a thread that matches the colour of the ribbon/bra)
  • scissors
  • a few hemming pins


Start off by measuring how high up you want the harness design to go. The best way I found was by putting the bra on and making a small mark at the highest point I want the ribbon to go. I then measured this height, and cut two pieced of ribbon to that length.


Next, work on the placement of the ribbon. I personally wanted the basic harness, with two bits of ribbon that went over my chest. Pin the ribbon in place, starting from the middle rim between the two cups. 


Once you are happy with your placement, it's time to sew the ribbon into place. This can be very fiddly, and you want to make sure that it's extremely secure! The amount of times I had to redo this because I didn't sew it strong enough to the ribbon just popped off...


You now need to sew the upper half of the ribbon in place. You can experiment with this (as I did in the photo, crossing them over) until you are happy with the placement. Once you've positioned the ribbon where you want it to be, making sure it's tight (you don't want a loose ribbon!), pin it into place. Be very careful, you don't want to stab yourself! I found bending the hemming pin  into an 'L' once it was in the right place allowed me to pin the ribbon while wearing the bra.


The final step is just sewing that ribbon into place, and then that's it! How easy was that?! You now have your own ribbon harness bra!


Thursday 15 September 2016

PIERCING PAIN SCALE

Hello! I am an avid collector of piercings, and I am currently on 14 (though have had a total of 16). I thought it might be useful to some people if I had a post that spoke about all 16 piercings I have had, where I rate them on their pain scale (10 being most painful), healing time (10 being most difficult), and overall recommendation (10 being go get it done), with a little bit about my experience!

EAR

LOBE
Pain: 2/10
Healing: 2/10
Overall: 10/10

Let's be real here, if lobe piercings were that bad, they wouldn't allow little babies to have it done (don't get me wrong, I don't agree with parents getting their kids ears pierced before they're even old enough to understand, but you know). It's more the anxious build up than the pain itself, it's like plucking one hair out and that's the pain over. Other than a slight warmth, there is not really much to the healing time. I'd recommend anyone who wants a lobe piercing to get them done.

HELIX/CARTILAGE
Pain: 4/10
Healing: 8/10
Overall: 8/10


Now my review of helix piercings might differ to other people. The first helix piercing I got was done at my go-to piercers, and they did a wonderful job. It hardly hurt at all! I then got 2 more helix piercings at a small piercers away from home, where they used almost a Victorian contraption- a large needle and a metal tube which they held on the back of the ear for the needle to go through. This was really, really uncomfortable and hurt a lot more than I imagined, not to mention the healing time. The issue I found with helix piercings is that because it's difficult to avoid sleeping on that side, they get irritated very easily (and you get the dreaded bump... which tea tree fixes!). I would recommend it, but maybe get used to sleeping on the other side first!

TRAGUS
Pain: 5/10
Healing: 5/10
Overall: 9/10


Remember that rumour where apparently you can hear a 'pop' when you get your tragus done? Yeah, that's a lie. I found getting my tragus pierced quite soothing, in a way. It was a little uncomfortable- just a harsh pinch, and then you feel the jewellery going through and then it's done! It was my first clamp piercing, which is strange if you haven't had one before. I never really had any issues with it, the only bummer is the fact you need to avoid putting your earphone in that ear for a week because it's a little sore!

SNUG
Pain: 9/10
Healing: 10/10
Overall: 6/10


This is my worst piercing I've ever had. I love it, don't get me wrong. But 2 months in and it's still too swollen to switch to a smaller bar. It was really uncomfortable getting done, and seemed to take longer than other piercings. But the pain after... I had headache after headache after headache. I was in too much pain, I couldn't sleep. The healing time is ridiculous. It was about 2-3 weeks before I got a somewhat decent good-nights sleep, and I still can't sleep on that ear. 2 months later, it's still very swollen, it's easily irritated so almost constantly has the dreaded bump, too. Please think very carefully before getting this piercing done.

VERTICAL TRAGUS
Pain: 4/10
Healing: 3/10
Overall: 7/10

This piercing did not hurt at all! It would get caught on my blusher brush when I was doing my makeup, and sometimes my hair would get caught around it. I noticed this one rejecting about 4 months after I had it done- the amount of bar showing alongside the balls increased a lot, but it was about a year before it had literally fully pulled its way out. If you're not looking for a permanent piercing but you want a cute one for a while, this one is great! It does leave a scar, though.

HORIZONAL TRAGUS STAPLE BAR
Pain: 7/10
Healing: 5/10
Overall: 3/10

This one was not worth it at all. My piercer told me I was the only person to have it done- she hadn't found it online before or anything, and she'd looked  a lot. The piercing stage was awkward, it took about 5-10 mins to actually clamp and insert the bar, and I had my head in my piercers chest the entire time! It only took a few months for this one to fully reject, too. As cool as it looked, I do not recommend getting this one done.


(Helix x3, Lobe x3, Horizontal Staple Bar)

FACE


NOSE/NOSTRIL
Pain: 3/10
Healing: 3/10
Overall: 10/10

My friends and I went and got our noses pierced together, and both of their eyes watered but mine didn't. It fully depends on the person, but the piercing itself doesn't hurt at all. It's a slight pinch, followed by almost a tight, heated feeling for a while. It begins to feel slightly achey, too, but it's not unbearable. I definitely recommend getting it done! The only issue is it takes a while to get used to something being there, so you get it caught frequently which is pretty painful, and putting a screw nose stud in is terrible at first!

SEPTUM
Pain: 5/10
Healing: 5/10
Overall: 8/10

This is the only piercing I have ever cried at! It was a spontaneous piercing, and my eyes would not stop streaming (please remember just how much eyeliner I wear, too!). Despite that, it hasn't been too bad. I've had it for 3 weeks now, and at first my nose didn't like it very much- I sneezed a lot more, and I would cry if I knocked it... especially if crusties had appeared or I was cleaning it. It was pretty bruised, and I noticed my nose had increased in size a bit. I'd wake up and feel like my face was dirty and gross, too... However, 3 weeks later and I feel like I've had it for ages! It's absolutely fine and I'm so excited to change the horseshoe.

(Nose and Septum)

OTHER

NIPPLE
Pain: 3/10
Healing: 3/10
Overall: 9/10

I'll be honest, I don't understand why people say nipple piercings are painful. Mine did not hurt... at all. In fact, other than nose/ears, I think it's my least painful piercing. They have to clamp it which is rather uncomfortable, and, if you're like me, the whole getting your boobs out thing is a bit awkward, but other than that, it was worth it! I do recommend sleeping with a bra on if you decide to get a nipple piercing as it does catch a lot (at least mine does). The sensitivity can change a lot, my nipple has lessened in sensitivity (hence why I only have the one pierced) but it can increase it for other people. I found salt soaking it to be quite stressful since you need to kind of fill a pot with the SSS and hold it on it. It seemed to heal really quickly, though. It can get irritated a lot, and if you're clumsy like me, you can get it caught easily (I totally didn't get it caught on the microwave earlier). If it's something you really want, or if you think it would make you feel better about your chest, I'd recommend getting it done!

If you ever have any questions about any piercings, feel free to ask me!
- Sian x